Just a mom...with a small cooking obsession. Nothing big! ha Join me throughout my journey of teetering with the thought of starting up a small catering business! My goal with this blog is to help other moms who have an ounce of time make awesome meals, throw the best parties with out of this world appetizers, and keep her sanity all at the same time. Welcome to my world!!

Tuesday, July 24, 2012

Baked Ziti

Saturday Derek and I took a little road trip to Bowling Green to help welcome my friend Ashley's new addition to her family! I love love love babies and could not wait to meet her...as expected she was absolutely perfect and precious. As the welcoming committee I found it fit to take food and make a few gifts for baby Scarlet! They are huge 49ers fans so I found it fitting to make her a 49ers tutu and matching bow for football season!


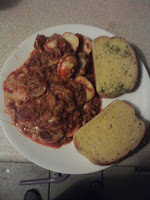
As far as food goes, I took the new dad and mom chocolate chip cookies, cheese garlic bread and made them baked ziti! Baked ziti is so very easy to make, can feed a crowd, freezes well, and is delicious!


Baked Ziti

What you need:
  • 1 box penne pasta
  • 1 block cream cheese, room temp. and cubed
  • 1 jar of your favorite spaghetti sauce, I like Ragu
  • 1 bag shredded pizza cheese
  • 1 bag shredded mozzarella cheese
  • 1 1/2 lb hamburger
Directions:
  1. In a large pot, cook pasta as directed on box until al dente.
  2. While pasta is cooking, in another larger pot brown hamburger and then drain.
  3. Add in your pasta sauce. Let simmer until pasta is complete.
  4. Once pasta is finished, drain and return to pan add in cubed cream cheese and 1/2 the bad of shredded pizza cheese.
  5. Stir until cream cheese is completely melted.
  6. Add in sauce mixture and stir well.
  7. Place in a 9x13 baking dish and cover with remaining bag and a half of cheese.
  8. If you are eating it right away, place in a preheated 350 degree oven until cheese is bubbly and lightly browned. If freezing cover and place in freezer.
**When I am making this dish for my house hold I like to saute a small onion, diced, and add to the hamburger and I like to put a can of mushrooms into mine as well. I also use the Ragu super chunky veggie or super chunky mushroom sauce.

Pork, Pork, and more pork....YUM!

Pork it's what's for dinner!!!

Pulled pork is extremely versatile! My favorite this to do is put it in the crock pot early morning and let it cook for about 6 hours on high shred it and separate it out and freeze half for another nights dinner!
For this post I will give you my recipes for making the pulled pork and then recipes for lime pulled pork tacos, cubans, bbq pulled pork, and sides such as homemade guacamole, pico, and different flavors to mix in!


For the starter pulled pork that you will be using in all of your recipes...

You will need:
  • 1 medium to large pork loin, fat trimmed off
  • 4 limes
  • 1 can or bottle of beer or root beer
  • 3 TBS season salt
  • Pepper to taste
  • 3TBS garlic powder
Directions:
  1. In a large crock pot, place trimmed pork loin in. You may have to cut in half for it to fit and that is perfectly fine.
  2. Pour in the bottle of beer and turn onto high
  3. Cook for at least 6 hours.
  4. Once cooked, save out 1 cup of the liquid and drain the rest.
  5. Using too forks pull the pork in the crock pot and add the reserved liquid back in.
  6. Roll the 4 limes on your counter, this helps to make them juicier. Then cut in half and squeeze liquid from each lime half into the pork. Between each full lime mix the pork.
  7. After all limes are in, add season salt, garlic powder, and pepper.
  8. Mix again.
  9. Separate 1/2 the pork into a separate container and freeze for another day!

Different Recipes for Dinner using your Pork!


*PORK TACOS

Pulled pork tacos have become my new favorite...no joke. My poor family has had to eat them once a week for the past 3 weeks! But they are healthy and I make fresh Pico and Guac to go with them and it just doesn't get any better! I am sure you will agree.


What you will need:
  • Limes cut into 6 sections each
  • Half your pulled pork
  • Hard taco shells
  • Shredded mexican cheese
  • lettuce
  • sour cream
  • homemade guacamole, recipe to follow
  • homemade pico, recipe to follow
  • store bought verde salsa, optional but very yummy with these tacos!!
Directions:
  1. Easiest directions in the world! Make sure the pork is warm and make your taco however you like it with whatever toppings you like. Combos are limitless. Make sure to squeeze a lime section over the pork after you put it on your taco!
These tacos taste so fresh and they are pretty good for you!


*HOMEMADE PICO


You will need:
  • 1 container of cherry or grape tomatoes
  • 1 small onion, diced
  • 1 handful of cilantro chopped finely
  • LOTS of salt, makes the juices really come out of the tomatoes
  • pepper to taste
  • Juice of 1 lime
Directions:
  1. Cut tomatoes into Fourths
  2. In a medium bowl, mix tomatoes, salt, pepper, onion, lime, and cilantro and refrigerate at least 2 hours before serving.

*HOMEMADE GUAC

You will need:
  1. 4 ripe avocados, cut, pitted, and scooped
  2. 1 small onion, diced
  3. 1 tomato, diced
  4. 1 tsp cumin 
  5. Juice of 1 lime
  6. 2 tsp salt
Directions:
  1. In a medium bowl, take the pieces of avocado and smash with a fork until chunks are small but not completely smashed.
  2. Add in diced onion, tomatoes, lime juice, salt, and cumin.
  3. Mix thoroughly and refrigerate until serving


*CUBAN SANDWICH


I was IN LOVE with this cuban restaurant that used to set by our house. It was absolutely amazing...but they closed it! Coco Loco's was no more and I was heart broken. They had so many things that I absolutely loved, fried pork and avocado sandwich, sweet potato fries, and fried plantains to name a few, but my *FAVORITE* was their Cuban Sandwich. Once they closed their doors I decided figure out how to make my own cuban and, I believe, it was a success!! Enjoy!

What you need:
  • Thinly sliced swiss cheese
  • Sandwich stacker dill pickles
  • Stoneground mustard
  • Thinly sliced deli ham
  • Hoagies
  • 2 TBS butter
  • Pulled pork
Directions:
  1. Slice hoagies in half. On the bottom half place a generous amount of the pork.
  2. On top of that place a layer (2-3 pieces) of ham.
  3. Next place a slice of swiss cheese.
  4. Followed by a pickle...or 2 and then spread the mustard on the top bun.
  5. Place the top bun on and lightly butter outside top and bottom bun.
  6. Place the sandwich 1 of 2 places...in your George Forman grill/panini press OR in a skillet pressing it down with a heavy pan on top of it to make it flat. 
  7. Let cook until each side is lightly browned. Make sure to flip it like a grilled cheese if you use the skillet method.
  8. Serve warm with sweet potato fries and ENJOY!!!


**BBQ Pulled Pork

What you need:
  • Pulled Pork
  • 3 TBS Season Salt
  • 3 TBS Garlic powder
  • 1 cup of your favorite BBQ sauce
  • 1 tsp liquid smoke
  • Hamburger buns
Directions:
  1. Mix all ingredients together and heat thoroughly.
  2. Serve on warm buns
I LOVE to top mine with pickles and onions OR good coleslaw! Enjoy!

By the way...Kroger has Kroger Brand BBQ sauces called cola, Dr.K, and Rootbeer! They are wonderful give them a try!


Yummy Chicken Carbonara

PASTA!!! Who doesn't love pasta dishes...especially easy peasy pasta dishes? Exactly...no one. While it is very easy to make homemade alfredo sauce I will save that for another recipe and teach you how to make this one using store bought ingredients!
This meal take no time to make yet taste like you have slaved for hours! It also feeds a lot of people so you can either opt to have left overs or even make this for a dinner party! Add a salad and garlic bread and wha laa super yummy dinner!

Yummy Chicken Carbonara

You will need:
  • 1 box fettuccine
  • 1 bag frozen peas
  • 1 jar store bought alfredo sauce
  • 8 pieces of bacon, cut into 1 inch pieces
  • 1 TBS butter
Directions:
  1. In a large pot, cook pasta as directed
  2. In a medium saucepan, on medium heat, put in butter and pieces of bacon. Fry until cooked through but not horribly crispy! Push around pan to keep pieces separate.
  3. When bacon is almost cooked, add in 1/2 the bag of frozen peas
  4. Once they are cooked through about 6-8 minutes, add alfredo sauce and stir. Let warm through.
  5. Drain pasta once it's complete and put back into the pot you cooked it in.
  6. Once sauce is warmed through add to pasta and toss enough to make sure all pasta is covered!
  7. Serve warm
**I also like to add 1/2 a diced onion to mine and about 4 oz of cut up mushrooms. IF you choose to add either of these you would add them in before you add in the peas and add in 1 extra TBS of butter. Cook for about 2 minutes and then add the peas and cook as directed above!

Monday, June 18, 2012

Yummy Chicken Casserole

I should say yummy and super easy AND you can even freeze it and use it another time chicken casserole!!
It seriously does not get any easier than this recipe and you will have most ingredients on hand! This is awesome for nights at the ball park or nights you worked late; it takes very little time and it won't disappoint.

Yummy Chicken Casserole

You will need:
  • 4 cups bow tie noodles, cooked and drained
  • 4 cups cooked chicken, cubed (you can even cheat and use canned if you would like just make sure to drain it completely!)
  • 1 package of frozen mixed veggies (I use the steamable ones they seem to cook faster but either will work)
  • 2 cups milk
  • 2 cans cream of chicken
  • 1 can cream of celery
  • 1 can cream of mushroom
  • 1 cup onion, diced (optional)
  • salt and pepper to your desired amount
  • 2 TBS garlic powder
  • 3 TBS butter
Directions:
  1. In a large bowl, combine chicken, mixed veggies, milk, soups, onion, salt, pepper, garlic powder and butter.
  2. Add noodles.
  3. Grease a 9x13 pan and pour in mixture.
  4. Cover with foil and bake for 30 minutes until bubbly.
**You can also turn this into 2 8x8 casseroles and eat one and freeze one for later! You can freeze for up to 3 months in a freezer tight container.

Not Your So So Potato Salad

I am NOT normally a potato salad fan...I will occasionally eat the loaded baked potato potato salad if it is done right, by my standards lol, but even that one doesn't normally get my attention, but I have found one that I have tweaked and worked on for a long time and I LOVE it! Hopefully you will adore it too!
Potato salad always seems to make the potlucks and cookouts so why not make it where people actually enjoy eating it!
Hope you enjoy!!

Not Your So So Potato Salad

You will Need:
  • 8 medium red potatoes
  • 2 hard boiled eggs, cooked, peeled and chopped
  • 1/2 c. sour cream
  • salt and pepper to taste
  • 2 TBS dry ranch powder mix
  • 8 stripes of bacon, cooked, drained, and crumbled
  • 1/2 cup bacon ranch dressing
Directions:
  1. Making sure NOT to overcook, place potatoes into a pot of water and bring to boil. When the potatoes are fork tender but NOT mushy drain and set aside.
  2. In a bowl, put sour cream salt, pepper, and DRY ranch dressing; mix well.
  3. Cut potatoes, that have now dried off and cooled, into bite sizes cubes
  4. Add potatoes and eggs into the sour cream mix.
  5. Add ranch dressing; if it seems to dry or not to your liking you can add more dressing just remember you can always add more but you can't take it back out! So add carefully :)
  6. Refrigerate at least 3 hours or over night to let all your flavors develop together.
  7. Add bacon right before serving.
I have even put cherry tomatoes into this right before serving and that put a bright fresh spin on it!

5 Cup Salad

Growing up I LOVED this stuff! If you have never had it don't snarl your nose up at the sour cream part, I know it seems like the odd ball out ingredient but it is wonderful mixed in...promise!
I know this is called 5 cup salad, I left the name the same even though I use more than 5 cups haha!

5 Cup Salad

You will need:
  • 1 can mandarin oranges, drained very very well
  • 1 can pineapple tidbits, drained very very well
  • 2 cups mini marshmallows, you can use the multi colored or white ones
  • maraschino cherries drained and sliced in half, as many as you like if you don't like these leave them out!
  • 1 cup flaked coconut
  • 1/2 cup sour cream
  • 1 cup cool whip
Directions:
  1. Mix all ingredients together and refrigerate AT LEAST 4 hours up to overnight before serving!

Wedding Potatoes

Okay, okay so these potatoes have absolutely nothing to do with a wedding BUT most people refer to these as "funeral" potatoes and that was a bit morbid for me so I decided to cheer the name up a bit! I think everyone has their own recipe for these type of potatoes, but if you don't or you'd like a new one I think mine is extremely yummy...and no worries, I am not being partial! ;)

Wedding Potatoes

What you need:
  • 2 lb of frozen cubed potatoes
  • 3 cups shredded shredded Velvetta cheese, divided ( I buy mine at Kroger)
  • 2 can cream of chicken soup
  • 2 cups sour cream
  • 1/2 small onion, diced (optional)
  • salt and pepper, to taste (you know what you like)
  • corn flakes OR Doritos, smashed to top with
Directions:
  1. Preheat oven to 350 degrees
  2. In a large bowl, mix sour cream, cream of chicken soup, salt, pepper, onion, and 2 cups of Velvetta cheese.
  3. Once mixed completely, stir in potatoes.
  4. In a seperate bowl, mix remaining cheese and either crushed corn flakes or Doritos, whichever you have chosen, and set to the side.
  5. Pour the potato mixture into a 9x13 baking dish and bake for 40-45 minutes. Make sure to check your potatoes...crunchy potatoes are a fail!
  6. After it bakes for 45 minutes, take it out and cover the top with the Dorito/corn flake cheese mixture. Place back into the over for a remaining 15 minutes or until bubbly and top is golden.

Cheesy Chicken Spaghetti

Before you snarl your nose up at the thought of chicken in your spaghetti...this recipe does NOT involve marinara sauce in any form or fashion. It involves a cheese sauce and is a very quick throw together dinner that taste like to took forever!


Cheesy Chicken Spaghetti

You will need:
  • Package of chicken tenders or boneless skinless chicken breast, cut into smaller cubes
  • 4 oz cream cheese
  • 1 pkg spaghetti
  • 1 can mild Rotel tomatoes
  • 1/2 block Velvetta, cubed into pieces
  • 1/4 cup sour cream
  • 1 can cream of chicken soup
  • 2 TBS cooking oil

Directions:
  1. Put on a pot of water to boil your spaghetti noodles like you normally would; when they are finished drain them and return to their pot. (Make sure to use a pot large enough to add a sauce to.)
  2. In a separate pot, add your cooking oil and heat. Add cut up chicken pieces. Cook until cooked completely through; stir as needed.
  3. Once chicken is cooked, add cream cheese, Rotel tomatoes, cubed Velvetta, sour cream, and cream of chicken soup.
  4. Leave over medium heat, stirring frequently, until all the cheeses are melted and all ingredients are combined and creamy.
  5. Pour sauce into spaghetti and use tongs to mix together very well.
  6. Serve immediately OR put in a 9x13 baking dish sprinkle with Panko bread crumbs and bake until it boils to use as a freezer meal or to take to a potluck.
Enjoy!


Thursday, February 2, 2012

Mini Fruit Pizzas

We all know how yummy fruit pizza is and I love making the full sheeted one baked from scratch...BUT here is the semi homemade recipe that is quick to throw together!


Mini Fruit Pizzas

What you need:
  • 2 dozen bakery fresh sugar cookies. ( the ones at Kroger and Walmart work great!)
  • 1 block cream cheese, softened
  • 1/2 cup powdered sugar
  • 1 TBS vanilla
  • 1 cup Cool Whip
  • fruit- I love to use blueberries, raspberries, strawberries-sliced, mandarin oranges, pineapple, etc you can use bananas but remember bananas and apples brown easy
Directions:
  • In a medium bowl, use your mixer to beat together cream cheese, vanilla, and powdered sugar. Once completely mixed and smooth fold in cool whip.
  • Spread mixture onto cookies evenly.
  • Top with fruit
  • Remember since it has Cool Whip in them extras need to be refrigerated.
These are so refreshing! They are extremely good and they will be gone...that's a guarantee!

Better Than Sex Cake...

YUP! Figured that would get your attention. This is NOT just a cake this is a cake full of chocolate, carmel, did I mention chocolate....gooey wonderfulness. No description could do this cake justice. Put it on your grocery list NOW! I promise you no matter where you take this cake people will ask for the recipe.

Better Than Sex Cake

What you need:
  • 1 chocolate cake, made by the directions on the back of the box and baked in a 9x13 pan.
  • 1 jar caramel ice cream topping
  • 1 jar hot fudge ice cream topping
  • 1 can sweetened and condensed milk
  • 1 large tub of Cool Whip
Directions:
  • When cake comes out of the over let cool about 10 minutes and then poke holes evenly over the cake with the bottom of a wooden spoon.
  • Pour the sweetened and condensed milk evenly over the cake. It will seep into the holes.
  • Do the same with the whole jar of caramel and the whole jar of hot fudge. It is a little easier to pour the caramel and hot fudge evenly if you heat them for a about 30 seconds to a minute first.
  • Refrigerate OVER NIGHT! This makes it so so much better I promise and gives it time for everything to soak in.
  • Right before serving cover evenly with the Cool Whip. This serves as the icing.
I promise this is a cake that if you love chocolate you will never forget!

Ladies Queso...

Since we have done a macho form of queso for the men let's do a more lady like version!
This is so good and so so simple!

Ladies Queso

You will need:
  • 1 block Velvetta, cubed
  • splash of milk
  • 1 can diced tomatoes
  • 1 box spinach, thawed and completely drained of ALL juice!
  • You can also add in a can of shredded chicken
Directions:
  • Turn crockpot on high, put in Velvetta cubes and milk.
  • Let cook about an hour, making sure to stir it often so it doesn't burn or stick
  • Once half melted, add in can of tomatoes and spinach (chicken as well if you decided you wanted chicken)
  • Let cook on high for about another hour then turn down to low. Just make sure to keep stirring it!
I have also added in mushrooms, green peppers, and onions.

YUM!

Cheeseburger Dip!

Yum...does it get any better than a cheeseburger that comes in the form of a dip?!? You can even have the option of dressing it just like your regular cheeseburger.

Cheeseburger Dip

You will need:
  • 1 block cream cheese, softened
  • 1 lb hamburger, browned, crumbled and drained
  • 1/2 c. sour cream
  • 2 diced pickles
  • 1/2 c. mayo
  • 3 TBS ketchup
  • 1 tsp mustard
  • 1 TBS Worcestershire
  • 2 cups shredded sharp cheddar cheese
  • 2 TBS garlic powder
  • OPTIONAL FOR THE TOP: shredded lettuce, chopped onion and chopped tomatoes
You can also add in bacon or bacon bits for a bacon cheeseburger

Directions:
  • Preheat oven to 375 degrees
  • In a medium bowl, mix together cream cheese, hamburger, diced pickles, Worcestershire, ketchup, mustard, mayo, sour cream, and garlic powder.
  • Pour into an 8x8 or 2 qt baking dish, top with shredded cheese.
  • Bake for 20 minutes or until bubbly.
  • Right before serving top with bacon, tomatoes, onion, and/or lettuce if you like your burger dressed!
YUM! You may never eat a burger on a bun again!!

For the Macho Man in your life...

A few MAN Dips for your favorite MACHO MAN....

Men love food...and they love football...so here are a few filling dips that even they can make!


Macho Man Dip

You will need:
  • 1 lb hamburger, browned, drained, and crumbled
  • 1 lb sausage, browned, drained, and crumbled
  • 1 block of Velveeta, cut into cubes
  • 1 can Rotel tomatoes and green chilies
  • Splash of milk
Directions:
  • In a crockpot, put in the Velveeta blocks, splash of milk, and can of tomatoes and green chilies. Turn on high for about an hour. Make sure to stir often.
  • Once cheese is at least half way melted add in meat.
  • Keep an eye on it and keep stirring, if more milk is needed to make it creamy add it in...slowly! Remember you can always put more in but you can't take it back out!
  • Once completely melted, turn down to low or warm
Serve with Tortilla chips.


Derek's favorite dip in the whole wide world he calls Skyline Dip...you may have had this or a version of this before but I will admit it is only 3 ingredients and super good!


Skyline Chili Dip

You will need:
  • 1 block cream cheese, softened
  • 1 can (found by the hot dog chili in a store) Skyline Chili
  • 1 bag shredded sharp cheddar cheese
**You can also add kidney beans and onions to this.

Directions:
  • In an 8x8 dish spread the cream cheese onto the bottom.
  • Spread on the can of chili
  • Top with bag of shredded cheese
  • Put in microwave for 5 minutes
Serve with tortilla chips!
I have also put this over fries before to make chili cheese fries.


Many Layer Taco Dip

Who doesn't love super easy and super yummy Taco Dip! Makes an awesome addition to any Super Bowl party or party throughout the year!

Many Layer Taco Dip

You will Need:
  • 1/2 lb. hamburger, cooked with taco seasoning, drained, and crumbled small
  • 2 medium tomatoes, diced
  • 1 medium onion, diced (optional)
  • 1 container of sour cream
  • 1 can refried beans
  • 1 block cream cheese, softened
  • 2 cups shredded mexican cheese
  • 1 cup lettuce
  • 1 small jar chunky salsa
Optional add ins layers: green onions, green chilies, black olives, guacamole

Directions:
  • On a platter OR dinner plate spread out the cream cheese evenly.
  • Top with a layer of refried beans
  • Layer hamburger
  • Layer of sour cream
  • Layer of salsa
  • Layer of cheese
  • Layer of lettuce
  • Layer of onions
  • Layer of tomatoes
  • Refrigerate until ready to serve!
  • Serve with tortilla chips

In honor of Super Bowl Weekend....

I think it is only appropriate to do appetizers that are SUPER easy yet everyone will LOVE! Whether you are throwing a Super Bowl Party or just taking a dish to a party I can provide you with all the options you will need! Hardest part will be choosing which one you want to make!

Let's KICK this off (get it haha) with PINWHEELS!
Who doesn't love pinwheels...they are the ultimate easy finger food and a recipe makes so many! My 2 favorite and super easy pinwheel types are Mexican Pinwheels and Ranch Pinwheels.

Mexican Pinwheels

You will need:
  • 1 package of the taco size flour tortillas (you can also use wheat ones)
  • 1 block cream cheese, softened
  • 1 package of taco seasoning
  • 1 small can chopped black olives
  • 1 small can, drained, chopped green chilies
  • 1/2 of a lime
Directions:
  • In a medium size bowl, mix together cream cheese, taco seasoning, olives, green chilies, and squeeze in the lime juice. make sure to mix it until the taco seasoning is completely mixed in.
  • Spread evenly over each flour tortilla and roll up one by one.
  • Instead of cutting them right away, through trial and error I have learned a trick to make them stay together and cut perfectly! Roll each tortilla and then wrap them individually in cling wrap or press and seal wrap. Then place in the refrigerator for at least 2 hours. I prefer to do mine the night before and leave them in there over night. It really helps the flavors develop and makes them set up perfectly.
  • After being in the refrigerator, unwrap from the wrap and slice! (Do NOT unwrap the actual tortilla with filling just take the wrapper off)
**You can also add a small can of canned shredded chicken into the mix!

Ranch Pinwheels

You will need:
  • 1 package of taco size flour tortillas (you can also use the wheat, spinach, or sun dried tomato ones)
  • 1 block cream cheese, softened
  • 1 package hidden valley ranch dry mix
  • 1 cup finely shredded sharp cheddar cheese
  • Mix ins are pretty much endless for this one! You can use 1 cup of bacon, can of shredded chicken, tomatoes, tomatoes bacon and lettuce together, olives, pineapple, chopped dried beef, anything!! It can make so many different combos!
Directions:
  • Mix together in medium bowl, cream cheese, shredded cheese, ranch mix, and any add ons you have chosen. Make sure to mix until the ranch mix is completely mixed in.
  • Spread evenly over each flour tortilla and roll up one by one.
  • Instead of cutting them right away, through trial and error I have learned a trick to make them stay together and cut perfectly! Roll each tortilla and then wrap them individually in cling wrap or press and seal wrap. Then place in the refrigerator for at least 2 hours. I prefer to do mine the night before and leave them in there over night. It really helps the flavors develop and makes them set up perfectly.
  • After being in the refrigerator, unwrap from the wrap and slice! (Do NOT unwrap the actual tortilla with filling just take the wrapper off)

Yummies Pot Roast Ever!

So my family has always been lovers of roast, but the boring plain old roast just put into water just wasn't cutting it... So I decided there has to be a way to spice it up where the kids will still eat it but it has a depth of flavor! Now Landon SWEARS he does not eat mushrooms and onions but even he loves this roast! He never asks for seconds but Tuesday night Lexi and Landon ate seconds! Ryanne...well she eats anything that doesn't eat her first so we don't judge much based on her. haha!
This recipe isn't salty and even makes it's own gravy and if you have lots of the extra gravy and roast it can easily be frozen and turned into beef stew or a vegetable beef soup later on. Best part you throw it in the crockpot and leave it!


What you need:
  • 1 med. to large beef roast
  • 1 box of the Lipton's beefy mushroom soup mix, both envelopes (if you don't like mushrooms you can just get the beefy kind without the mushrooms)
  • 1 lg. can Healthy Start French Onion soup found in the soup isle with the Progressive and Campbell's Chunky soups.
  • 3 cups of water (or enough to almost cover the roast)
  • 6 TBS of flour
  • bag of baby carrots
  • 6 potatoes cut into large chunks
Directions:
  • Put the roast into your crockpot turned on high. Add everything in and mix together EXCEPT the carrots and potatoes.
  • After mixed add in carrots.
  • Cook on high all day. When you get home add in the potatoes; they will only take about an hour to cook.
  • Leave it on high all day! You won't believe how it just falls apart! It will be boiling when you look at it that is what you want :)
Sometimes I leave the potatoes out and make mashed potatoes to go with it because the juice in with the roast makes its own gravy you can pour over top. The kids LOVE it this way :)
Hope you enjoy!!

Tuesday, January 10, 2012

Moist Pumpkin Muffins! (Best part...they are HEALTHY!!)

OK... so we all live on diets ladies...go ahead admit it! We constantly worry about how we look, how big we are, and how far we can stretch those weight watcher points! WELL I these pumpkin muffins are absolutely amazing to die for yummy and are healthy! Oh did I mention simple with ONLY 3 ingredients...yup just 3!!! OH and the best part of all only 2 weight watcher points!!!!

Pumpkin Muffins

You will need:
  • 1 box spice cake mix
  • 1 15 oz can pumpkin puree
  • 1 c. water
Directions:
  1. Preheat oven to 350 degrees
  2. Line muffin pan with cupcake liners OR grease with non stick cooking spray
  3. With mixer, beat all ingredients together
  4. Fill liners, or cups in the pan, 2/3 way full
  5. Bake about 15-20 minutes or until toothpick comes out clean. I start checking mine at 12 minutes because my oven is very sensitive!! Be careful not to over cook them.

Monday, January 9, 2012

So simple you can't screw it up... Chocolate Chip Cheesecake!

I have not always been a cheesecake fan...something about the texture of some cheesecakes is just not appealing to me. BUT we have made a wonderful friend through baseball who is a chef and his secret recipe cheesecake is the most amazing thing....EVER. NO LIE! I can seriously sit and eat the entire thing by myself I think if I tried. Sadly, no this is not his super top secret recipe but a super yummy easy cheesecake that even the pickiest of cheesecake eaters (me) loves!!
It is very creamy and you get to buy the crust...It doesn't get any easier and it is pretty foolproof!

FOOL PROOF CHOCOLATE CHIP CHEESECAKE

You will need:
  • 1 c. mini milk chocolate chocolate chips, divided
  • 1 premade Oreo Cookie crust (normally found with all the baking stuff)
  • 2 8oz. packages of cream cheese
  • 2 eggs
  • 1/2 c. sugar
  • 1/2 tsp. vanilla
Directions:
  1. Preheat oven to 350 degrees.
  2. In a large bowl, beat with a mixer your cream cheese, vanilla, and sugar until completely smooth and not grainy
  3. Add eggs one at a time and mix on medium speed until blended
  4. Stir in with a spoon 1/2 cup of the chocolate chips
  5. Pour into crust
  6. Sprinkle the remaining 1/2 cup of chocolate chips evenly over the top
  7. Bake 40-45 minutes until the center is just about set. If it stays in too long it will crack and become too brown so make sure to watch it!
  8. Refrigerate at least 3 hours after coming out of the oven this will help finish the middle setting and make it easy to cut and come out clean.
Enjoy!

Sunday, January 8, 2012

Mt. Dew Apple Dumplings

Well...I can say this has been such a wonderfully lazy weekend! I love those and they are definitely few and far between in my world! Yesterday, I went shopping BY MYSELF for 5...yes 5 hours!! Then picked up the girls and went to dinner at Wicks with friends. Today....I have been lazy. Extremely lazy...got up at 10 only because the girls got up, took a nap from 1-3:45 this afternoon, went to baseball signups and now on to dinner (out because once again I am being lazy), then to coach cheerleading at our 8 pm game. Not going to lie...after that i plan on going straight back to bed! hahaha. Needless to say, if I am not well rested this week then there is something wrong with me!
So in the honor of my laziness today...I thought I would go with a comfort food! What is better than Mt. Dew Apple Dumplings! Super easy and extrememly yummy!!

Mt. Dew Apple Dumplings


You will need:
  • 2 cans crescent rolls
  • 4 larger apples, tart ones
  • 1 tsp cinammon
  • 1 can Mt. Dew
  • 1/2 c. butter
  • 1 1/2 c. sugar
Directions:
  1. Preheat oven to 350 degrees
  2. Spray a 9x13 baking dish
  3. Peel and core each apple; cut each apple into 4 equal pieces
  4. Roll one slice of apple in each crescent roll and place lined up in the baking dish
  5. In seperate bowl melt butter in your microwave and then stir in sugar and cinnamon until completely mixed
  6. Pour over crescent apples
  7. Pour Mt. Dew evenly over apples
  8. Bake for 45 minutes until dumplings are lightly browned and bubbly.
This is sooo easy but addictive be careful you may eat the whole pan! They are super sweet as well this is why you need to use a tart apple to off set it some :)

Friday, January 6, 2012

Rainbow Cupcakes

Ok...we are only 6 days into January and I almost failed tonight by forgetting to put up a recipe! Shame on me how in the world am I going to be on top of this the rest of the year?!?

For my daughter's, Ryanne, 1st birthday party in December it was a cupcake themed party! I decided instead of take home goody bags we would do decorate your own take home cupcakes! I had cupcakes that were plain, lots of different icings to put on them, sprinkles, bubblegum, gummy worms, m&ms and lots of other goodies for the kiddos and adults to decorate their cupcakes with. Then I took the white paper bags and drew a cupcake on them and wrote "Thanks for making my 1st birthday "sweet"!" After their cupcakes were decorated they put it down into their bags and took them home as a goodie for later! This went over very well...the best part was it wasn't just a regular cupcake I made rainbow cupcakes!!

Rainbow Cupcakes

You will need:
  • 1 box white cake mix (and all ingredients on the back that are needed to bake the cake.)
  • Food coloring. I prefer the Wilton gel colors-you can get them at Michaels or WalMart for sure
  • Cupcake liners
Directions:
  1. Preheat your oven to the degree on the back of the cake mix box.
  2. Beat all cake ingredients as directed on the back of the box.
  3. Once all ingredients are mixed well seperate into 4-5 different ceral bowls in even amounts.
  4. Add a different color gel/coloring into each bowl and mix until the exact color you want the batter to be
  5. Put cupcake liners into cupcake pans
  6. With a different spoon for each different colored batter, put 1 tsp. of each color into each liner. Keep alternating until the liners are 2/3 way full. DO NOT MIX THEM! They will look like mudd not rainbow
  7. Bake according to the time on the back of the box and then test with toothpick until it comes out clean!
  8. When you bite into these you will see all the different layers of color.
It is super easy to turn this into 2 9 inch cakes too! Just spoon the different colors into the round baking pans and bake! This is very easy but will baffle people who eat them wondering how you did this!

Thursday, January 5, 2012

The Recipe People ALWAYS Ask For.....

Drum roll.................
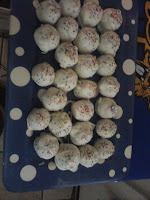
CAKE BALLS!!! No not out of a cake ball maker those are not the same! You can make these into balls, suckers, creatures, decorated any way you like...no matter what flavor they are WONDERFUL!
Some of my favorite flavor combos are:
  • Red Velvet with cream cheese icing dipped in white or milk chocolate
  • Orange cake with vanilla icing dipped in white to make dreamcicles or dipped in milk chocolate to make chocolate covered oranges
  • Cherry chip with cherry icing dipped in milk or dark chocolate makes chocolate covered cherry
  • German chocolate cake mix and icing dipped in regular chocolate rolled in nuts makes german chocolate
  • Chocolate with hershey chocolate icing dipped in milk chocolate make triple chocolate (my fav!!)
  • French vanilla cake mix with cream cheese icing dipped in white chocolate
The posibilites are ENDLESS! So get creative and have a cake ball party! Roll in sprinkles, oreos, nuts, colored sugars anything you want!!

Cake Balls

What you need:
  • box of your favorite cake mix (and all the things on the back it says you need to bake it)
  • 1small box instant pudding mix, whatever flavor matches the cake mix you have chosen
  • 1 container of icing
  • 2 bags of whatever chocolate you want to melt and use OR 1 package of flavored almond bark
Directions:
  1. Bake cake as directed ONLY add in the pudding mix before you mix it. NO MILK JUST THE DRY MIX!!
  2. When the cake comes out let it cool.
  3. After it cools use your hands to crumble it finely into a LARGE bowl.
  4. Mix in 3/4 container of icing flavor you have chosen.
  5. Use a fork or your hands to mix the icing into the cake crumbles. Make sure to mix completley if you need more icing add it! It should not feel dry or cakey at all should be very moist!
  6. Roll into 1 1/2 inch balls and place on a tray of any kind that is flat and can fit in your freezer.
  7. After all balls are rolled, and it will make lots, place a toothpick into the top of each one.
  8. Freeze overnight or for several several hours until frozen!
  9. Heat chocolate in 30 sec. intravels until melted. Make sure not to over heat to where it becomes crusty.
  10. Take your balls out of freezer and dip in the chocolate using toothpick.
  11. After dipping in chocolate remove toothpick and cover the little toothpick hole with chocolate.
Please note: Squirrels do LOVE cake balls...if left out even with a lid on them outside they will take off the lid and eat them. I know this from experience! Trust me! hahaha....Why yes there is a story to go with this...if any of you know me you are completely NOT shocked!

Baked Ravioli


Tonight was one of those nights...I knew it would be MORE than crazy because we had cheerleading practice and it would be late when we got home to eat but the last thing I wanted was McDonalds! This is where freezer meals come in handy! While I actually just prepared this earlier in the day it can very easily be done way in advance and frozen!! Then just put in a preheated oven the night you want it! It makes a huge 9x13 pan and can very easily feed a crowd! It is also semi homemade which just makes it that much easier!

Baked Ravioli

What you need:
  • 1 bag of cheese ravioli (or whatever kind you like) frozen. I use Meijer brand and the mini round ones.
  • 2 bags of mozzerella cheese, shredded
  • 1 1/2 lbs ground beef, cooked, drained
  • 2 jars of your favorite speghetti sauce
  • 1 large can of mushrooms, drained (optional)
Directions:
  1. Preheat oven to 375 degrees.
  2. In a large bowl mix hot ground beef, frozen ravioli, mushrooms, and sauce together.
  3. Pour into the 9x13 baking dish and cover evenly with the bags of shredded mozzerella.
  4. Cover with foil and bake 30 minutes. Uncover and bake 15 more or until middle is hot and cheese is completely melted.
I serve this with garlic bread! You can also serve it with steamed broccoli to get some green worked in there!

Wednesday, January 4, 2012

BLT Dip

I know what you are thinking....gross! I thought the same thing until I tried it...it is anything but gross. This seems to be a lot of my friends favorite, especially Amber. She request it at every get together! You can serve it with pretzels, bread, beer bread, chips, veggies, cardboard....it is great on anything really! :) I usually serve mine in a bread bowl with extra bread cut up around it.

BLT DIP

You will need:
  • A bag of shredded lettuce
  • 1 cup mayo
  • 1 cup sour cream
  • 1 bag real bacon pieces (right next to bacon bits in store)
  • 2 medium tomatoes cut up small
  • 1 cup shredded sharp cheddar cheese
  • whatever you want to serve it with
Directions:
  1. In a bowl mix together the sour cream, mayo, cheese, bacon pieces, and tomatoes.
  2. Refrigerate until ready to serve.
  3. Right before serving add 1 big handful of lettuce...if you like more feel free to add more!
This is such an easy throw together for parties and get togethers. It is great in the winter and summer :) Hope you enjoy!

Tuesday, January 3, 2012

Bacon Wrapped Weenies!

Seriously...I can think of very few things that are not good wrapped in bacon...very very few! Well this recipe is kinda sorta like one I am sure you have seen but we are stepping it up a notch with a secret ingredient!
Growing up my mom made this for a lot of get togethers. Throughout the years I have seen the recipe posted but never the same as she made them growing up. What is that super top secret ingredient you ask...Coca Cola! Crazy I know!
I promise though these will not disappoint. We went to a party for New Year's Eve and these were gone...fast!

Bacon Wrapped Weenies

You will need:
  • 1 package of bacon cut horizontally into 4 equal halves.( I cut mine while it is IN the package makes it much easier!)
  • Toothpicks
  • 2 packages of the Little Smokies
  • 12 oz Coke
  • 1 cup brown sugar
Directions:
  1. Preheat your oven to 400 degrees.
  2. Wrap each little smokie with a piece of the cut bacon and secure it with a toothpick.
  3. Place each one as you wrap and secure them lined up into a 9x13 pan. They should sit lined up touching so you can get as many as possible in your pan.
  4. Once all are wrapped and placed in there sprinkle the brown sugar over them evenly.
  5. Next pour Coke evenly over the bacon wrapped weenies.
  6. Place into the oven for 30 minutes or until bacon appears cooked and no longer has the translucent look. The Coke mixture will be boiling.
  7. Once out of the over pick up each weenie by it's toothpick and place in a serving dish! Serve warm.
These are amazing!! I mean out of this world amazing!! Try them...they are like Pringles you can't eat just 1!

Not your normal rock hard Sausage Balls!

Yes, yes I realize that I have been MIA for 6 months from this blog but instead of having the same yearly resolution on January 1st I have decided that I will try something new that maybe, just maybe, I can stick to this year. SOOOO I have decided to be super dedicated to this blog! Hopefully you will enjoy my blog and recipes as much as I enjoy cooking and trying out new recipes!
All of these recipes are mine or tweaked but my promise to you is NOT to make you poison, make someone sick, or gag by making one of these for your family and friends!
I will try to provide pictures for each recipe even if they aren't posted the moment the recipe is. :)
Lets kick off this blog with a new twist on sausage balls!
What can seem like it can be so easy to make can easily turn into a flaky shoe leather hard rock...so lets revamp it!

Sausage Balls

You will need:
  • 1 lb. sausage I use mild but you can use any heat you want
  • 1/2 jar of Cheese Whiz
  • 1 individual packet of the Bisquick mix (you will find it right beside the boxes but it gives you the exact amount without measuring! Awesome i know!)
  • 1 pkg finely shredded sharp cheddar cheese
Directions:

  1. Preheat your oven to 375 degrees.
  2. In a large bowl mix together sausage, Bisquick mix, and shredded cheese. I use my hands, they seem to be the best mixer I own, but you can use a fork.
  3. Once mixed pretty well add the Cheese Whiz. This will make the rest of the Bisquick mix in and leave behind no powder traces. You will notice they become super mushy feeling.
  4. Roll 2 inch balls and put them on a GREASED 9x13 baking pan.
  5. Bake in preheated over for 15-20 minutes. You will know they are done when they are lightly browned on the top.
My promise to you (if you followed directions) is that these will be moist and awesome! Not an object you could knock out a window with :)